
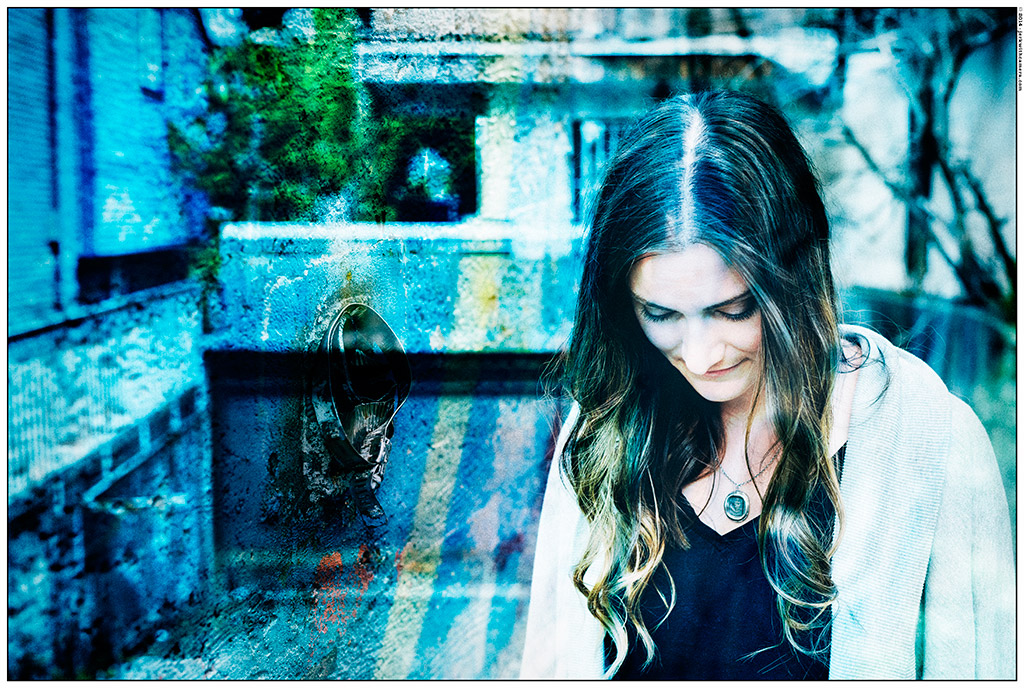
For this shoot with Cait, I wanted to try something new with my Nikon D610: Digital multiple exposures. Basically, it’s layering shot of her onto another image, and the result is pretty cool. You get all these different expressions and movements blending together, making each photo feel like it’s telling a little story. We wandered a bit around Commercial Drive and found some great textures to play with as well as some random Bamboo.

Cait was great to work with—she jumped right in, giving different poses and expressions that made the whole process fun and easy. Honestly, it was a bit of trial and error, but that’s what made it interesting. Each shot turned out different, with some totally unexpected surprises.


We eventually left Commercial drive and headed over to this skate park that lives underneath Hastings near the PNE where we were yelled at by a security guard for where we parked.
I also played a bit with some off camera flash as a way to help separate Cait from the second exposures.
 Shooting multiple exposures digitally with the Nikon D610 allows me to blend two or more images in-camera, creating unique, layered effects. Using the camera’s built-in multiple exposure mode, you can capture multiple shots that overlap, resulting in artistic compositions directly in the digital file. This feature is great for creative portraiture, surreal landscapes, or any scene where layering textures, shapes, and light can add depth to your photography.”
Here’s a quick guide on using the multiple exposure feature on the Nikon D610:
- Access the Multiple Exposure Mode:
- Press the Menu button.
- Navigate to the Shooting Menu (camera icon).
- Scroll down and select Multiple Exposure.
- Enable Multiple Exposure:
- Select Multiple Exposure Mode and set it to On or On (Series) if you want to take more than one multiple exposure shot without re-enabling the feature each time.
- Choose the Number of Shots:
- Under Number of Shots, choose how many exposures you want to combine (typically 2 or 3 for most effects).
- Select Blending Mode:
- In the Overlay Mode setting, you can choose from options like:
- Average: Blends images evenly.
- Add: Brightens the image with each exposure (good for darker backgrounds).
- Lighten or Darken: These modes retain the lightest or darkest parts of each exposure, which is ideal for creating ghostly or surreal effects.
- In the Overlay Mode setting, you can choose from options like:
- Take Your Shots:
- Frame and capture the first exposure. After taking the shot, you’ll see a preview of it on your LCD screen.
- Adjust your composition for the next shot(s) if needed, keeping the first exposure in mind to create interesting overlaps.
- After the final shot, the D610 will automatically merge the exposures.
- Review and Refine:
- The camera will display the final merged image. If you’re not happy with it, you can adjust settings and try again.
Experiment with different subjects, angles, and lighting to see what works best for your creative vision.
 These photos are a mix of moments, all stacked together to show different sides of her personality at once. It’s a bit like looking at a mini time-lapse, but in a single shot. Hope you enjoy checking them out as much as we enjoyed making them!